Connect the charging hub to your Wi‑Fi network
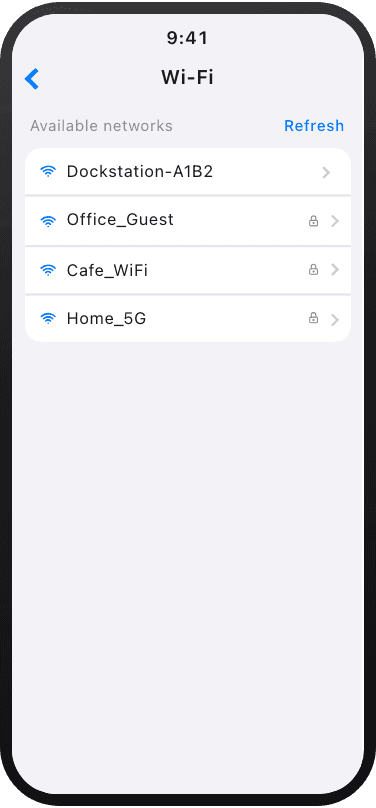
1. Connect to the hub’s own network
Start by connecting your phone straight to the charging hub. On screen and in the network name the hub calls itself Dockstation.
- Open the Wi‑Fi settings on your phone.
- Find the network whose name starts with Dockstation- — it is open, with no password.
- Tap it to connect.
2. Open the control panel
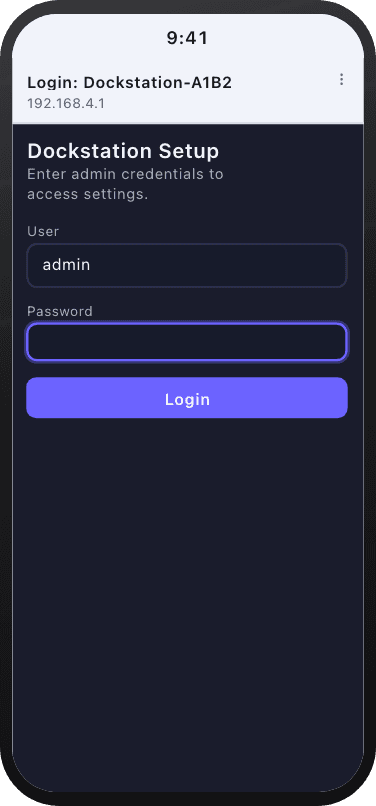
Your phone should open the setup page by itself. If it doesn’t, open a browser and go to 192.168.4.1.
- On the Dockstation Setup screen, type admin in the User field.
- Enter the administrator password in the Password field.
- Tap Login.
The administrator password is sent to you separately. Please don’t pass it on.
3. Go to network settings
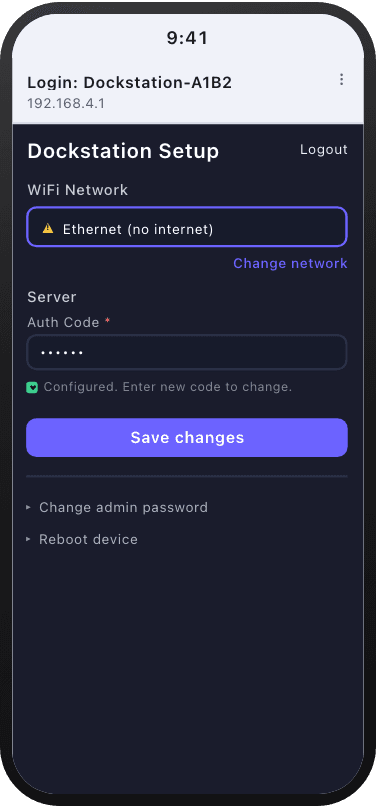
You’ll land on the hub’s main settings menu.
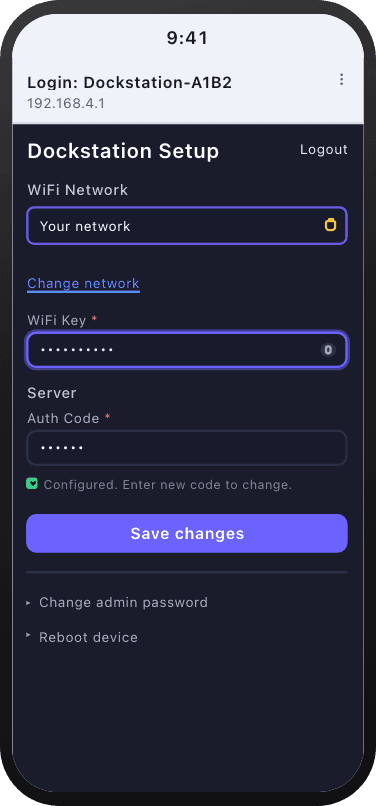
- The WiFi Network block shows the current status — for example, Ethernet (no internet).
- Tap the blue Change network link on the right.
4. Choose your work network
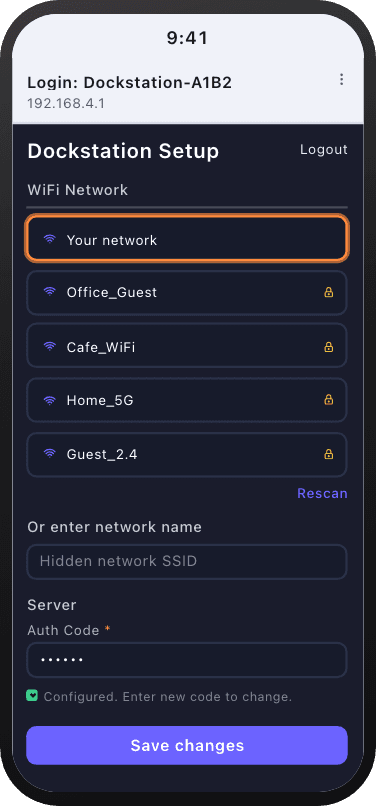
The hub scans and lists every Wi‑Fi network it can see.
- Scroll to your organization’s work network.
- Tap its name.
5. Enter the password and save
- A WiFi Key field appears. Enter the password for that network.
- Check the password before you save — the eye icon on the right shows the characters.
- Tap the blue Save changes button.
Done!
The hub saves the settings, restarts and connects to the internet over your Wi‑Fi. Your phone drops the Dockstation- network and goes back to normal.
Still stuck? Write to us — we answer quickly.